Adding a Little 'IoT' to a 80's Sci-Fi Themed Party

I was tasked by my friend to assist in organizing a bunch of interactive elements for an 80's Sci-Fi themed birthday party he recently hosted, ensuring that there were engaging elements distributed throughout the house for all the guests to enjoy. Luckily, he had already established a Home Assistant instance, simplifying the process of crafting these elements and automations. All that was required were a few additional devices, sensors, and other essential components which I had a stockpile of already at home.
So, what did we come up with? Here are a few elements we successfully crafted out of the long list of ideas we initial planned to do...
GU10 Ceiling Zigbee Bulbs
We swapped out the existing GU10 Zigbee bulbs with a few of my RGB ones in certain areas around the house. From there a simple automation was setup in Home Assistant to change the colour and effect over a certain time period.
Simples.
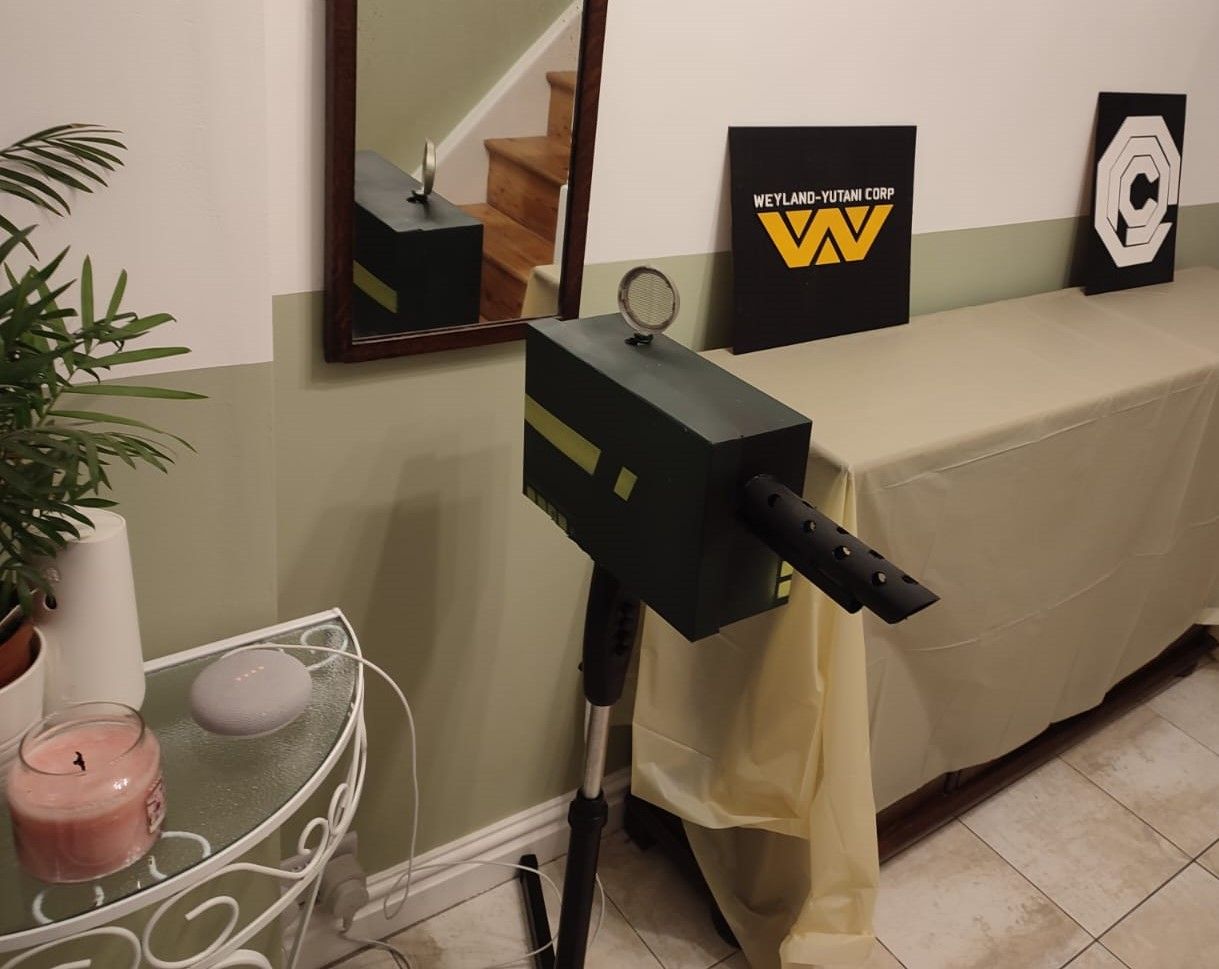
Front Door 'Sentry Gun'
As the title suggests. this involves a 'Sentry Gun' which was made by repurposing an old home swinging fan and replacing the 'fan' element (blades and cage but keeping the motor) with a handmade gun turret. The fan was powered (switched on/off) via a Zigbee smart plug (GP-WOU019BBDWG) and activated via an automation once the front door was opened (triggered by a Aqara Door and Window Sensor). Also included in the automation was an audio clip from Alien which was casted to a Google Nest Mini.
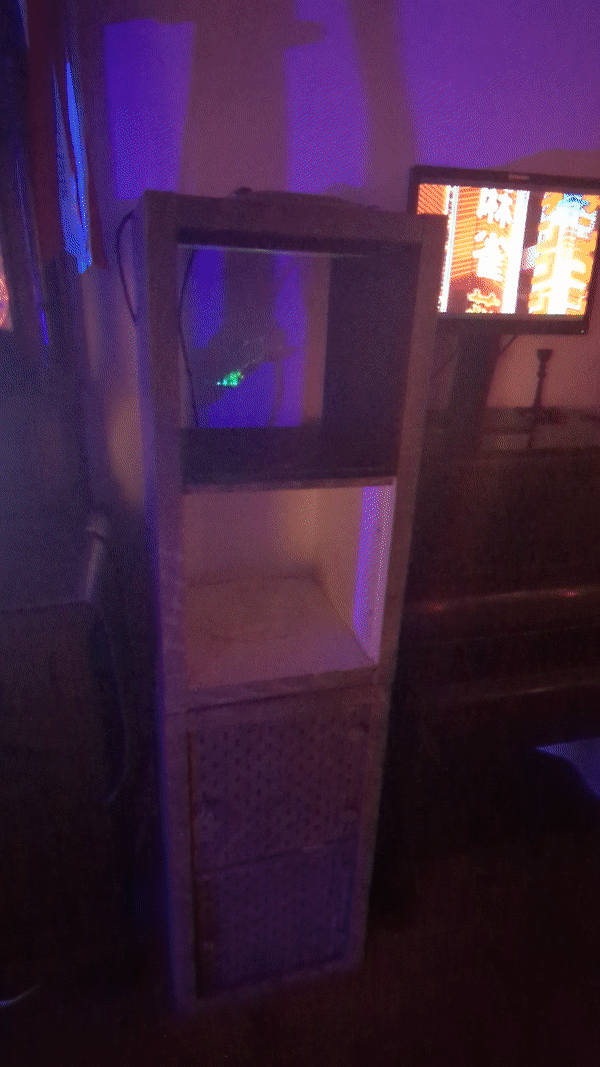
The "Terminal"
This consisted of two IKEA KALLAX units stacked on top of each other in order to look like a sort of "computer terminal/unit" you'd find in Sci-Fi movies.
The initial design for the "terminal" was going to house two monitors on the top half, displaying various video clips on a loop and would of included an interactive button pad in-between. However due to time constraints and trying to source two monitors that would fit within the units, we ultimately had to make some sacrifices s and ended up with a simpler version instead.
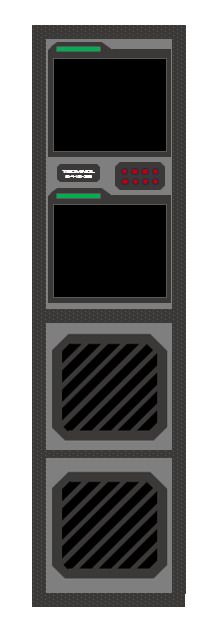
In the end we scraped the second monitor and replaced with a "biometric hand scanner" which we conjured up using a hand print mould made out of "Gel Wax".
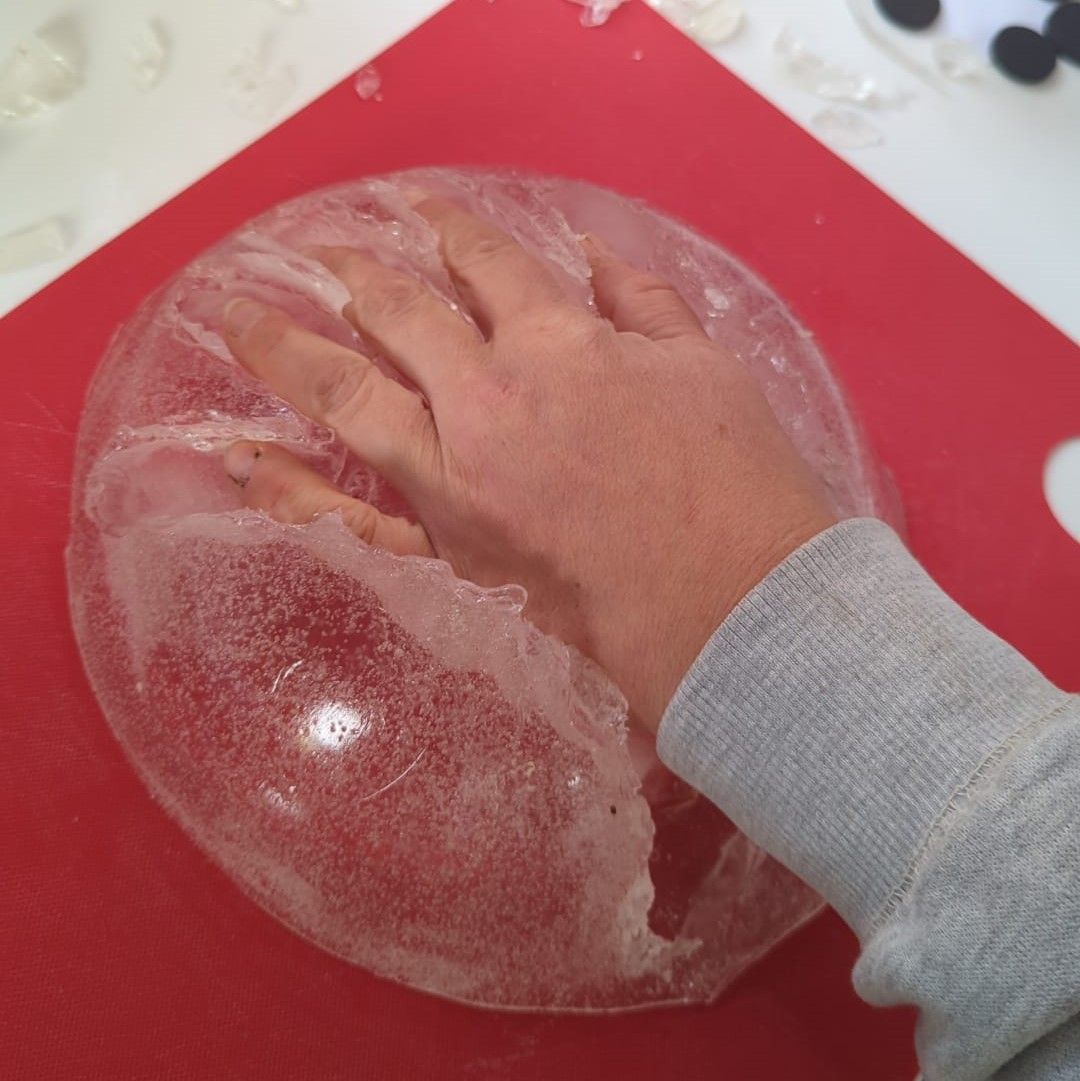
Underneath the transparent hand print mould was a LED RGB strip, connected to an ESP8266 (flashed with WLED) and triggered using an IKEA PIR motion sensor which was mounted above. To add some extra flair, we included some LED RGB strips in the bottom two units as well.
The top monitor (connected to a PC displaying a looping equaliser video) was mounted to the top of the unit and reflected onto a sheet of acrylic at a 45 degree angle.
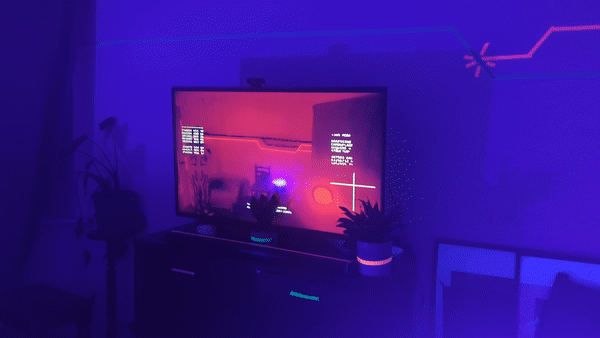
"Terminator Vision"
This did not actually involve any 'IoT'ing but I thought it's worth mentioning. Simply put, I managed to replicate the "HUD display/vision" from the film "Terminator" onto the Living Room TV using a webcam along with a few bits of tinkering and software. Out of all of the elements we made and setup for the party, this took the longest to create by far.
Initially I intended to recreate the HUD display from scratch using either some coding magic or painstakingly creating a GIF in good old Adobe Fireworks but I luckily managed to stumbled across someone who had done for the leg work for me.
The next step was to cut/trim the existing video and then convert it into a GIF to remove the black background making it transparent (leaving only the white text/elements). Once that was all done, I used the newly created GIF as an overlay on OBS Studio, tweaked the colour settings to make it red and used the webcam video as the main video source.
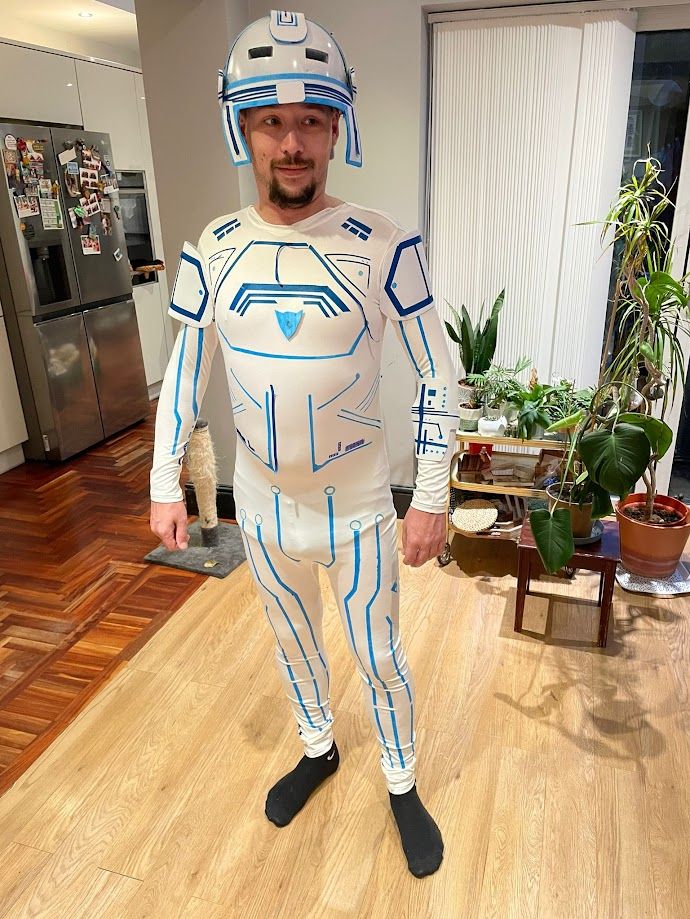
By the way, if you were curious about my costume, I dressed up as the original Tron.